TL;DR:
- Regular inspection and timely DIY repairs can significantly extend a fence's lifespan beyond 20 years. Proper tools, corrosion-resistant fasteners, and seasonal maintenance are essential for durable and long-lasting boundary structures. In Dublin's climate, proactive care prevents rot, corrosion, and structural failures that typically lead to costly replacements.
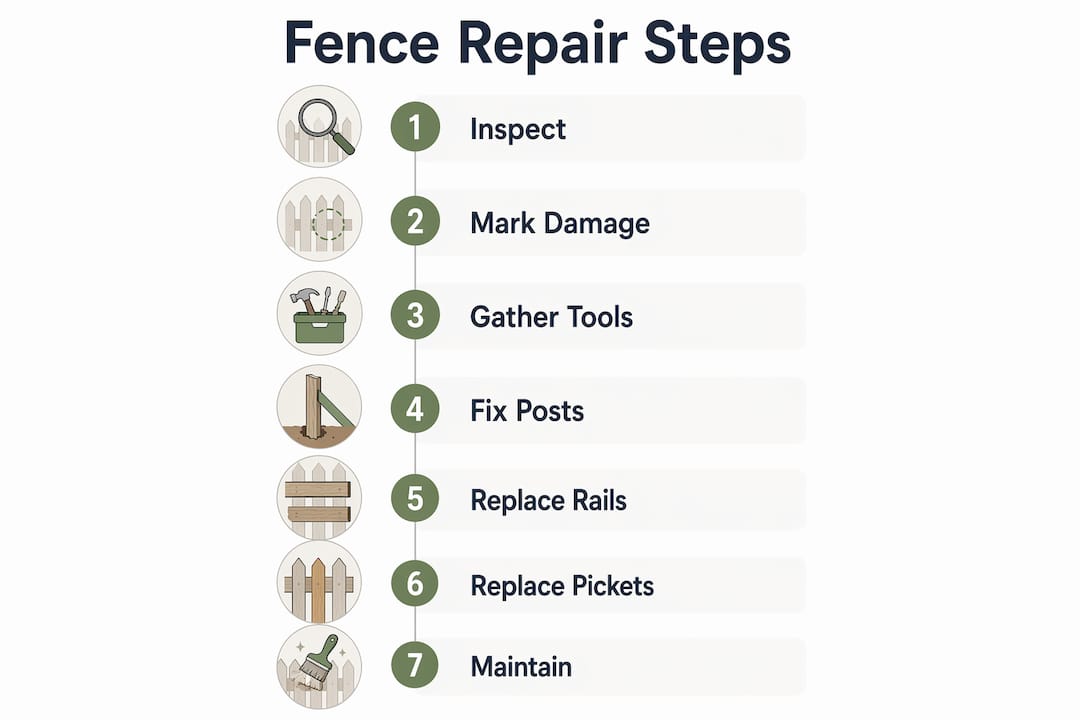
A fence repair guide is a practical framework for diagnosing, fixing, and maintaining boundary structures to restore security and appearance. Dublin's wet winters, coastal winds, and ground frost make fence deterioration faster here than in drier climates. A well-maintained wooden fence lasts over 20 years, while a neglected one fails within 8–12 years. That gap is closed entirely by timely DIY repairs using the right tools, the right fasteners, and a clear inspection routine. This guide covers every stage, from spotting early rot to replacing a leaning post, so you can protect your property without calling in a contractor for every job.
How do you assess fence damage and decide what needs repairing?
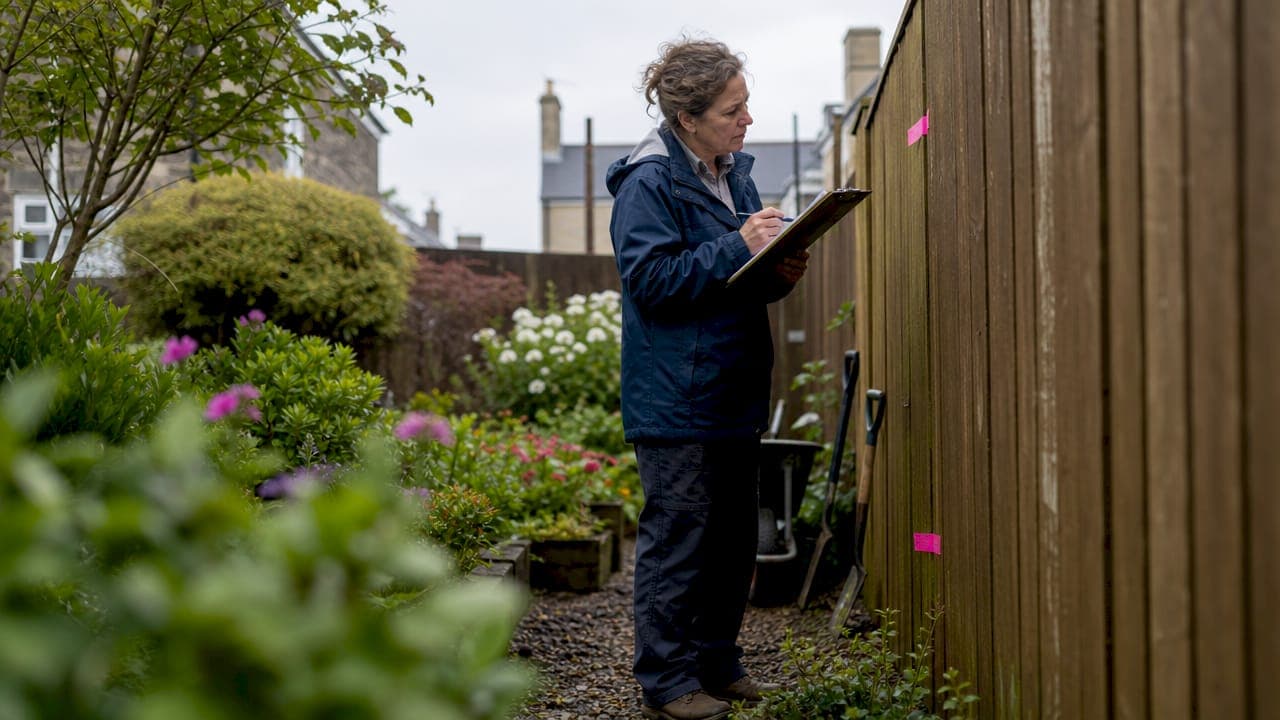
A systematic inspection is the foundation of any effective fence repair. Walk the full perimeter of your fence before touching a single tool. Look at every post, rail, picket, and gate fitting as a separate component, not as one continuous structure.
Start with the posts. Push each post firmly at shoulder height. A post that rocks more than a centimetre has lost its footing and needs immediate attention. Next, press a screwdriver into the base of each post at soil level. If it sinks more than a centimetre without resistance, rot has set in below ground. This screwdriver test catches hidden decay that looks fine from the surface.
Check rails and pickets next. Sagging rails indicate either a failed post or a broken rail joint. Loose pickets that rattle or lean outward signal that fasteners have corroded or the wood has shrunk away from the fixing point. Both are straightforward fixes if caught early.
Common signs that require action:
- Posts leaning more than a few degrees from vertical
- Rails pulling away from posts at the bracket or notch joint
- Pickets with visible cracks, splits, or dark staining at the base
- Gates that drag, fail to latch, or sit unevenly in the frame
- Rust streaks running down metal hardware onto timber
Pro Tip: Mark damaged sections with bright tape or chalk as you walk the perimeter. This gives you a repair list before you start, so you buy exactly the materials you need and avoid repeat trips to the hardware shop.
Label each problem area by type: post failure, rail damage, picket replacement, or hardware issue. Grouping repairs by category saves time and lets you batch similar tasks together on repair day.
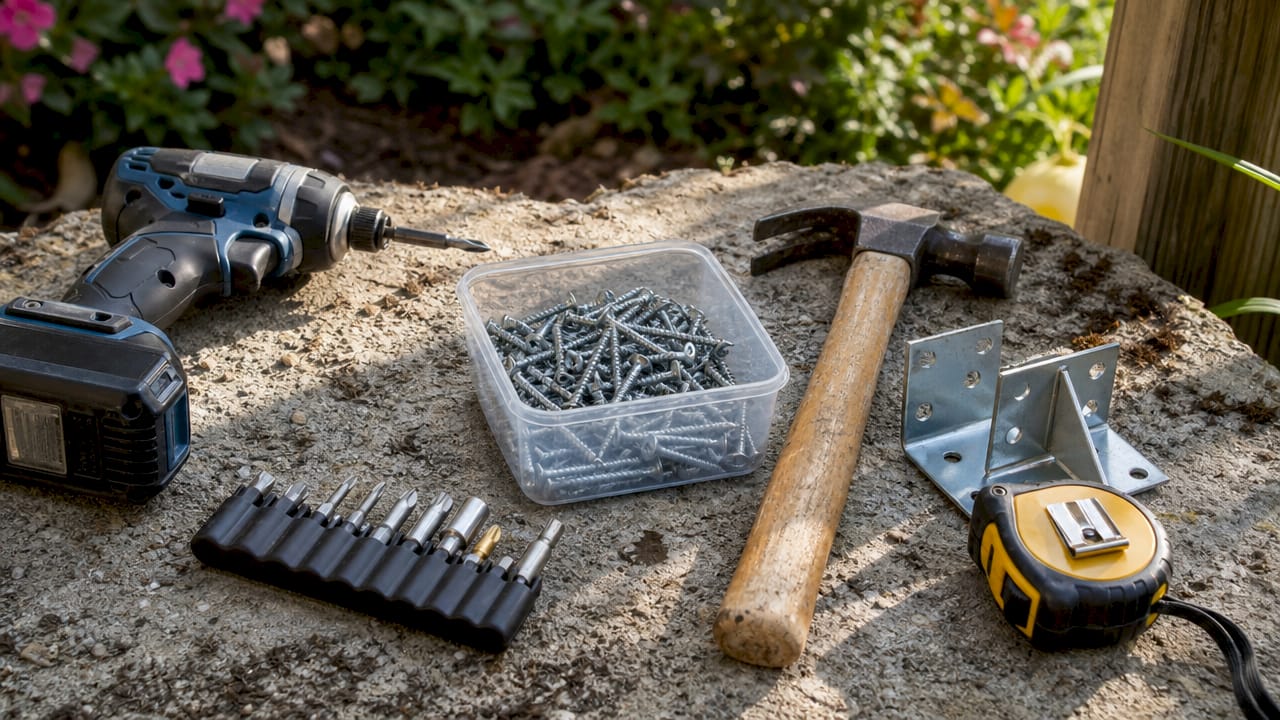
What tools and materials do you need for effective DIY fence repair?
The right tools make the difference between a repair that lasts a decade and one that fails by next winter. Impact drivers outperform standard drills when driving thick deck screws into dense treated timber. They apply rotational torque in bursts, which prevents screw stripping and stops the wood from splitting along the grain.
| Tool or material | Function | Why it matters |
|---|---|---|
| Impact driver | Drives deck screws into treated timber | Prevents stripping and wood splitting |
| Digging bar and spade | Excavates around post bases | Needed for post replacement or sistering |
| Bubble level and plumb line | Checks vertical alignment | Keeps posts straight after repair |
| Exterior-grade deck screws | Fastens rails, pickets, and brackets | Higher pull-out resistance than nails |
| Simpson Strong-Tie brackets | Reinforces rail-to-post connections | Adds structural support without full replacement |
| Fast-setting concrete | Secures post footings | Stabilises repaired or new posts quickly |
| Wood stain and sealant | Protects timber from moisture | Extends lifespan and prevents rot |
Avoid nails on exterior repairs entirely. Wood expands and contracts with Dublin's humidity fluctuations, and nails lose their grip over time. Deck screws hold significantly better in high winds and wet conditions.
Essential materials to have on hand before starting:
- Exterior-grade, corrosion-resistant deck screws (50mm and 75mm lengths)
- Carriage bolts with washers and nuts for post-to-post connections
- Pressure-treated timber for replacement posts and rails
- Wood preservative for cut ends of treated timber
- Protective gloves, safety glasses, and a dust mask for treated lumber work
Pro Tip: Buy a box of mixed-length deck screws rather than a single size. Different repairs need different penetration depths, and having both 50mm and 75mm screws on site prevents delays.
Only use compatible metals for fasteners and hardware. Mixing steel screws with aluminium brackets, for example, causes galvanic corrosion. This chemical reaction eats through the weaker metal within a few seasons and leaves your repair worse than before.
How to repair leaning posts, rotted posts, broken rails, and damaged pickets
Repairing a leaning or rotted post
The sistering method is the most cost-effective fix for a post that has rotted at the base but remains structurally sound above ground. Sistering involves driving a steel stake or a length of pressure-treated timber into the ground directly beside the damaged post, then bolting the two together above the rot line.
Follow these steps for a sistered post repair:
- Dig around the base of the damaged post to expose the rotted section. Remove loose or crumbling wood.
- Cut away the rotted portion if it is above ground. Treat the cut end with wood preservative immediately.
- Drive a steel fence stake or a 100mm x 100mm pressure-treated timber post into the ground beside the original, to a depth of at least 600mm.
- Align the new stake vertically using a bubble level and plumb line. This step determines whether your fence runs true.
- Drill pilot holes through both the original post and the new stake. Use carriage bolts with washers to connect them firmly above the rot line.
- Pour fast-setting concrete around the base of the new stake if the ground is soft. Allow it to cure fully before reattaching rails.
For posts that have failed completely at the footing, full replacement is necessary. Dig out the old post and concrete footing entirely. Set the new post in fast-setting concrete, check alignment with a plumb line, and brace it in position while the concrete sets.
Always wear gloves and a dust mask when cutting or handling pressure-treated timber. The preservative chemicals used in treated wood are hazardous when inhaled or absorbed through skin contact.
Fixing broken rails and damaged pickets
A broken rail is usually a splice repair rather than a full replacement. Cut out the damaged section cleanly. Fix a Simpson Strong-Tie bracket to the intact rail on each side of the gap, then cut a new length of matching timber to fit. Screw through the bracket into both the existing rail and the new splice piece. This method restores full structural strength without removing the entire rail span.
For loose or broken pickets, remove the old fasteners completely. Do not try to drive new screws into the same holes. Shift the picket slightly or use a wider screw to bite into fresh timber. Space pickets evenly using a scrap piece of timber as a spacer gauge. Drive two deck screws per rail per picket for a secure, wind-resistant fixing.
Pro Tip: When replacing multiple pickets, lay them all out on the ground first and check for warping. A warped picket will never sit flat against the rail, no matter how many screws you use. Reject any that bow more than 5mm over their length.
What maintenance practices prevent future fence damage?
Regular maintenance is the single most effective way to protect your fence investment. Reapply stain and sealant every 2–3 years, always during a dry spell. Wait for at least three consecutive dry days before application so the timber is not holding moisture. A simple test: sprinkle water on the fence surface. If it beads, the sealant is still working. If it soaks in, resealing is overdue.
Cleaning comes before any treatment. Keep pressure washing below 1,500 PSI and hold the nozzle at least 30cm from the surface. Excess pressure gouges the wood grain and opens pathways for moisture. For vinyl fencing or areas with mould growth, a diluted white vinegar solution is safer and equally effective.
Seasonal checks to add to your property maintenance routine:
- Autumn: Clear leaf build-up from fence bases. Decomposing leaves trap moisture against timber and accelerate rot.
- Winter: Monitor for frost heave after cold snaps. Posts that appear taller than before, or gates that suddenly won't close, signal ground movement. Defer major repairs until the ground thaws fully.
- Spring: Tighten all fasteners. Lubricate gate hinges and latch mechanisms with a weather-resistant oil. Check for any winter damage to rails and pickets.
- Summer: Inspect for UV fading and surface cracking. This is the best time to apply stain or sealant.
Gate and hinge maintenance is as critical as caring for the fence panels themselves. A gate that sags pulls the adjacent post out of alignment over time, creating a cascade of structural problems. Tighten hinge bolts every spring and replace any hinge that shows surface rust before it corrodes through.
Dublin's climate combines high rainfall, coastal salt air in many areas, and ground frost in winter. This combination accelerates both timber rot and metal corrosion faster than inland UK locations. Building a seasonal maintenance schedule specific to Dublin's conditions is not optional. It is the difference between a fence that lasts 20 years and one that needs replacing in under a decade.
Key takeaways
Effective fence repair combines early damage detection, correct fasteners, and a consistent seasonal maintenance routine to extend fence lifespan well beyond 20 years.
| Point | Details |
|---|---|
| Inspect before you repair | Use the push test and screwdriver test to find rot and instability before buying materials. |
| Choose screws over nails | Exterior-grade deck screws resist pull-out far better than nails in Dublin's wet, windy conditions. |
| Sister before you replace | Bolting a new stake beside a rotted post saves time and money compared to full post replacement. |
| Seal every 2–3 years | Reapply stain and sealant during dry weather to stop moisture infiltration and rot. |
| Monitor for frost heave | Check post heights and gate alignment after cold winters and repair only after the ground thaws. |
What I have learned from fixing fences in Dublin
Working with Dublin properties over the years, the mistake I see most often is homeowners waiting too long. A loose picket is a five-minute fix with two deck screws. Left for a season, it levers the rail out of the bracket, which then pulls the post, and suddenly you have a 400-euro repair instead of a five-minute job.
The second most common mistake is using the wrong fasteners. Galvanised nails from a DIY shop look fine in the packet, but they lose grip within two winters in a coastal Dublin garden. Stainless steel or hot-dipped galvanised deck screws cost a little more and last three times as long. That is not a marginal gain. It is the difference between a repair that holds and one that fails.
I am also a firm believer in the sistering method for post repairs. Most homeowners assume a rotten post means digging out a full concrete footing, which puts them off the job entirely. In reality, if the rot is confined to the base and the post is sound above ground, sistering takes about an hour and costs a fraction of a full replacement. Learning that one technique alone can save Dublin homeowners hundreds of euros over the life of a fence.
My honest advice: do the inspection walk twice a year, in spring and autumn. Carry a screwdriver and a piece of chalk. Mark anything that moves or feels soft. Fix it within a fortnight. That simple habit, done consistently, is worth more than any single repair technique.
— gerard
Professional fence care in Dublin from Sherrypropertycare
Some fence repairs are straightforward DIY jobs. Others, particularly full post replacements or extensive rot damage across multiple panels, are better handled by a professional with the right equipment and local knowledge.

Sherrypropertycare provides professional grounds maintenance and fence care services across Dublin, helping homeowners and property managers keep their boundaries secure and looking their best. Whether you need a full fence maintenance assessment or want expert advice before starting a repair, Sherrypropertycare is ready to help. Send a photo of your fence to get a personalised quote, or visit Sherrypropertycare to find out more about the full range of property care services available across Dublin.
FAQ
How often should I inspect my fence?
Inspect your fence twice a year, in spring and autumn. This catches winter frost damage and summer UV wear before either becomes a costly structural problem.
What is the sistering method in fence repair?
Sistering means bolting a new steel stake or pressure-treated post directly beside a damaged post to restore support without digging out the original footing. It is the most cost-effective fix for base rot.
Can I use nails instead of screws for fence repairs?
Nails are not recommended for exterior fence repairs. Deck screws provide far greater pull-out resistance and hold their grip through wood expansion and contraction caused by Dublin's humidity changes.
How do I know when to reseal my wooden fence?
Sprinkle water on the fence surface. If it soaks in rather than beading, the sealant has failed and reapplication is due. Reapply stain and sealant every 2–3 years during a dry period for best results.
What causes fence posts to shift in winter?
Frost heave occurs when frozen ground expands and pushes posts upward or sideways. Signs include posts that appear taller than before or gates that no longer close properly. Wait until the ground thaws fully before carrying out structural repairs.