
TL;DR:
- Proper surface preparation, including cleaning, repairing, and priming, is essential for durable exterior painting that withstands Dublin’s damp climate.
- Applying paint in correct technique, working in sections, and observing weather conditions ensures a lasting finish and prevents premature peeling.
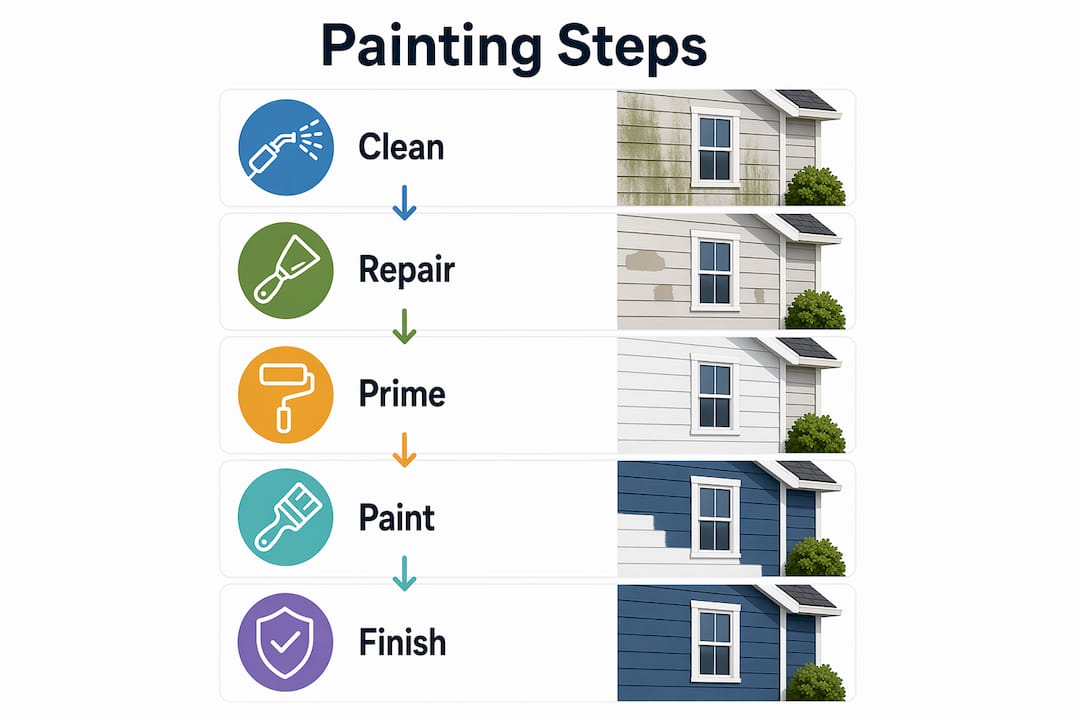
Painting your home's exterior is defined as the process of cleaning, repairing, priming, and applying protective paint to all outside surfaces in a planned sequence. Done correctly, it protects timber, masonry, and render from moisture, UV damage, and general weathering. Preparation accounts for 70 to 80% of total project time, with the full process typically spanning two to three weeks when drying and weather windows are factored in. This guide covers every home exterior painting step in order, with specific advice for Dublin's climate where cool temperatures and unpredictable rainfall make timing critical.
What tools and materials are essential for home exterior painting?
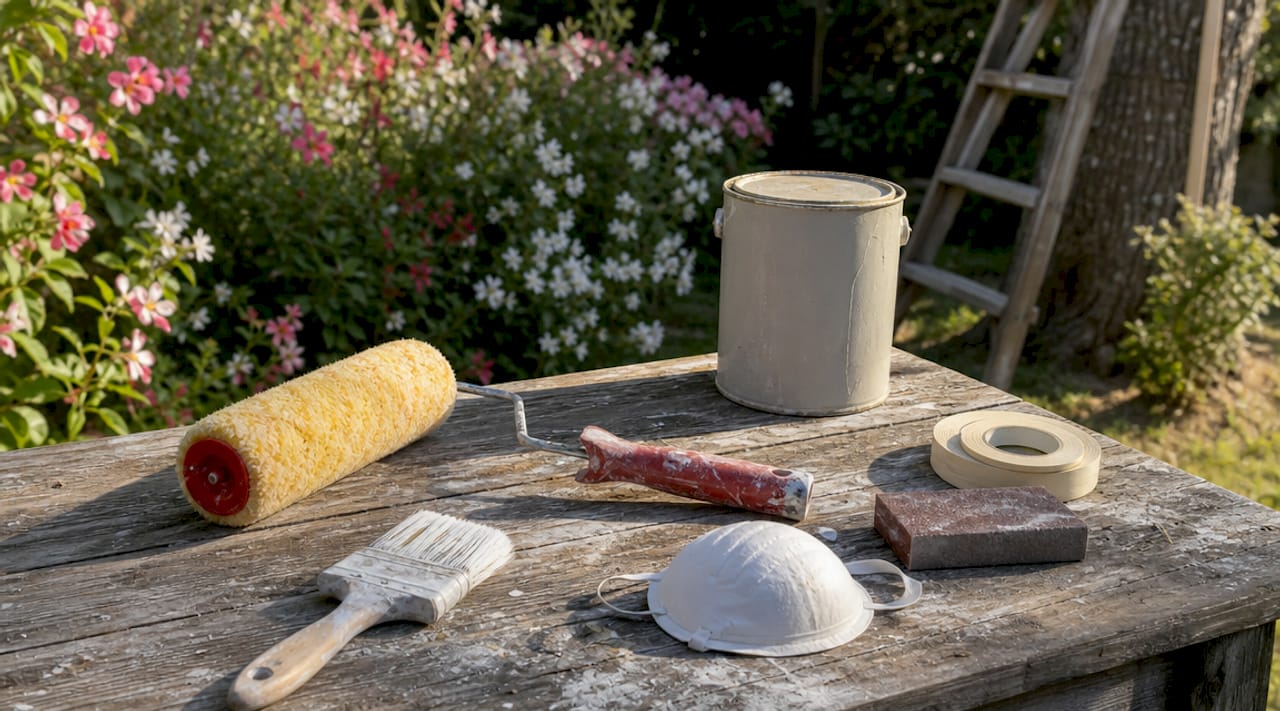
The right equipment determines whether your finish lasts five years or fifteen. Before you buy a single tin of paint, gather everything listed below. Sourcing tools in advance avoids mid-project delays that expose bare surfaces to rain.
Core tools
- Pressure washer (or a stiff-bristle brush and hose for smaller areas)
- Scrapers and wire brushes for removing loose or flaking paint
- Orbital sander or sanding blocks (80 to 120 grit) for smoothing surfaces
- Angled cutting-in brushes (50 to 75 mm) for trim and window frames
- 9-inch rollers with medium-nap sleeves for flat siding
- Airless sprayer for large surfaces, used with back-rolling
- Extension pole for rollers to reduce ladder moves
- Ladders and scaffolding rated for your working height
- Safety goggles, gloves, and dust masks
Materials comparison
| Item | Purpose | Notes |
|---|---|---|
| Exterior masonry or timber paint | Main protective coat | Choose a product rated for Ireland's damp climate |
| Dedicated exterior primer | Adhesion on bare wood or metal | Paint-plus-primer products do not replace this on bare surfaces |
| Paintable exterior caulk | Sealing gaps and joints | Must be fully cured before painting over |
| Mildewcide wash or sugar soap | Pre-paint cleaning | Kills spores that cause paint to peel |
| Masking tape and dust sheets | Protecting windows, doors, and plants | Remove tape while paint is still slightly tacky |
Pro Tip: Buy 10% more paint than your surface area calculation suggests. Texture, porosity, and a second coat always consume more than the tin's coverage estimate.
For Dublin homes specifically, look for paints labelled for high-humidity or coastal conditions. Brands such as Dulux Weathershield and Johnstone's Stormshield are formulated for the wet Atlantic climate and are widely available at Woodies and Chadwicks across the city.
How to prepare your home's exterior surface for painting?
Surface preparation is the step most DIY painters underestimate. Paint applied to a dirty, damp, or damaged surface will fail regardless of its quality. Follow these steps in order and do not rush the drying stages.
-
Pressure wash all surfaces. Work from the top of the building downward. Use a fan nozzle at 1,500 to 2,000 PSI to remove dirt, algae, and loose paint. For a detailed approach to this stage, the Lucan power washing guide covers technique and equipment choices for Irish homes.
-
Treat mildew and algae. Apply a diluted mildewcide solution and scrub affected areas. Rinse thoroughly. Skipping this step means spores survive under the new paint and cause bubbling within a season.
-
Allow full drying time. Surfaces must dry for 24 to 48 hours after washing, and up to 72 hours for shaded north-facing walls. Painting over trapped moisture causes blistering. In Dublin's climate, plan this stage around a dry weather forecast.
-
Scrape and sand. Remove all loose, flaking, or peeling paint with a scraper. Follow with an orbital sander to feather the edges of any remaining paint so there is no hard ridge. A smooth base is what separates a professional finish from a patchy one.
-
Repair damaged surfaces. Fill cracks in render with exterior filler. Replace any rotten or split timber boards before painting. For Dublin homes with older timber sash windows or Victorian-era fascias, this step often takes longer than expected. The residential repairs guide for Dublin homeowners is a useful companion resource here.
-
Caulk all gaps and joints. Apply paintable exterior caulk to every gap around window frames, door frames, and where different materials meet. Proper caulking separates a five-year paint job from a twelve-year one by blocking the moisture pathways that cause paint failure from behind.
-
Prime bare areas. Apply a dedicated exterior primer to any bare wood, bare metal, or heavily patched masonry. Paint-plus-primer products do not replace dedicated primer on these surfaces, and skipping this step shortens the paint's lifespan significantly.
Pro Tip: Run your hand across a sanded surface before priming. If you can feel a ridge where old paint ends, sand further. The paint will highlight every imperfection, not hide it.
What is the correct technique for applying exterior paint?
Application technique is where many DIY projects fall short. Correct method prevents lap marks, uneven coverage, and premature peeling. Follow this sequence for every section of the building.
-
Start on shaded elevations. Begin on the side of the house that is out of direct sun. Painting in direct sun causes flash drying, which prevents the paint resin from forming a continuous film. Surface temperature can exceed air temperature by 10°C or more on a sunny Dublin afternoon, making this a real risk even in mild weather.
-
Work from top to bottom. Paint fascias and soffits first, then walls, then lower sections. This order means any drips fall onto unpainted surfaces and get covered as you work down.
-
Cut in around trim and windows. Use a 50 to 75 mm angled brush to paint a 75 mm band around all edges, frames, and corners. This gives the roller a clean line to work up to and avoids getting wall paint on trim colour.
-
Apply paint with a roller or sprayer. For flat siding, a 9-inch roller with a medium-nap sleeve covers ground quickly. If using an airless sprayer, back-roll immediately after spraying to push paint into the siding's pores and texture. Skipping back-rolling leaves paint sitting only on the surface, reducing durability significantly.
-
Maintain a wet edge. The wet edge technique means always rolling back into paint that has not yet dried. Work in 1.2 to 1.8 metre sections horizontally, completing each band before moving along. This prevents the lap marks that appear when wet paint meets a dried edge.
-
Apply two full coats. One coat is never sufficient on exterior surfaces. Premium exterior paints require four hours touch-dry time and 24 hours before recoating, extended to 48 hours in cool or humid conditions. In Dublin, the 48-hour interval is the safer default from September through April.
- Avoid painting when rain is forecast within four hours
- Do not paint when temperatures are below 10°C (50°F) or above 32°C (90°F)
- Keep a wet rag nearby to wipe any drips before they dry on trim or glass
How to manage drying time, weather conditions, and finishing touches?
Getting the paint on the wall is only part of the job. How you manage the days that follow determines whether the finish lasts a decade or starts peeling within two years.
-
Respect the temperature window. Paint applied below 10°C often fails within the first year, even if the tin claims a lower minimum. Air and surface temperatures between 10°C and 32°C give the resin time to cure properly. In Dublin, May through September offers the most reliable window, though dry spells in April and October are workable.
-
Monitor humidity. High humidity slows drying and can cause paint to sag or run. Aim for relative humidity below 85% during application and the first 24 hours of curing.
-
Protect fresh paint from rain. If rain arrives within four hours of application, the paint film has not set and will wash or streak. Check Met Éireann forecasts the evening before each painting day, not just the morning.
-
Remove masking tape at the right time. Pull tape off while the second coat is still slightly tacky, at roughly 30 to 60 minutes after application. Waiting until the paint is fully hard causes it to tear along the tape edge, leaving a ragged line.
-
Touch up before full cure. Walk the building after the second coat has dried and mark any thin spots, missed edges, or roller holidays with a pencil. Touch these up before the paint reaches full cure at 30 days, as fresh paint bonds better to partially cured paint than to a fully hardened film.
Pro Tip: Keep a small tin of leftover paint labelled with the room or elevation it covers. Minor touch-ups in year two or three are far easier when you have the exact colour and sheen to hand.
For ongoing advice on exterior property maintenance that extends the life of a fresh paint job, including gutter clearing and render inspection, Sherrypropertycare's blog covers the full picture for Dublin homeowners.
Key takeaways
Successful home exterior painting depends on thorough surface preparation, correct application technique, and strict adherence to drying and weather conditions throughout the process.
| Point | Details |
|---|---|
| Preparation is the majority of the work | Prep accounts for 70 to 80% of project time; rushing it causes early paint failure. |
| Drying time is non-negotiable | Allow 24 to 72 hours after washing before painting, and 24 to 48 hours between coats. |
| Dedicated primer matters | Use a separate exterior primer on bare wood, metal, or heavily patched areas for lasting adhesion. |
| Wet edge technique prevents lap marks | Work in 1.2 to 1.8 metre sections and always roll back into wet paint to avoid visible joins. |
| Weather windows determine longevity | Paint only between 10°C and 32°C with low humidity and no rain forecast within four hours. |
What I have learned from exterior painting projects in Dublin
The single biggest mistake I see homeowners make is treating preparation as optional. They spend a weekend washing and sanding, decide it looks good enough, and start painting on day three. Six months later, paint is lifting at every gap and joint because the caulking was skipped or the surface was still damp.
The weather in Dublin is genuinely unforgiving for exterior paint. I have watched a well-applied coat blister within a season because the homeowner painted on a warm October day without checking that the north-facing wall had dried fully after three days of rain. The surface felt dry to the touch but held moisture underneath. A moisture meter costs about €20 at any hardware shop and removes all the guesswork.
Quality materials are worth the extra spend. The difference in price between a budget masonry paint and a product like Dulux Weathershield or Johnstone's Stormshield is roughly €15 to €20 per tin. Over a ten-year lifespan, that is negligible compared to the cost of repainting five years early. I always recommend spending more on paint and less on tools you can hire.
Working at height deserves more respect than most DIY guides give it. A scaffold tower hired for a weekend costs less than €100 in Dublin and is far safer than leaning a ladder against a fascia board for hours at a time. If the job involves anything above first-floor level, hire the tower.
Finally, the small details make the finished result look professional. Crisp cut-in lines around window frames, tape removed at exactly the right moment, and a final walk-around to catch roller holidays before the paint cures fully. These are the steps that separate a result you are proud of from one you stop noticing because it never quite looked right.
— gerard
Professional exterior property care in Dublin

If your project involves significant repairs, large surface areas, or you simply want a guaranteed finish without the time commitment, Sherrypropertycare works with Dublin homeowners and landlords to deliver high-quality exterior maintenance and painting support. From pressure washing and surface preparation through to full exterior painting projects, the team brings the right equipment and local knowledge to every job. Get in touch via sherrypropertycare.ie to request a customised quote. Send a photo of your property and get a clear, no-obligation price tailored to your home's specific needs.
FAQ
How long do home exterior painting steps take in total?
The full process typically takes two to three weeks from start to finish, accounting for washing, drying, repairs, priming, two coats, and curing time between each stage.
What temperature is safe for exterior painting in Ireland?
Air and surface temperatures between 10°C and 32°C are the recommended range. Paint applied below 10°C frequently fails within the first year even if the product label suggests a lower minimum.
Do I need a primer if I am using paint-plus-primer?
Yes, on bare wood, bare metal, or heavily patched areas. Paint-plus-primer products do not replace a dedicated exterior primer on these surfaces, and skipping it reduces the paint's long-term adhesion.
How soon can I apply a second coat of exterior paint?
Most premium exterior paints are touch-dry in four hours but require 24 hours before recoating. In cool or humid conditions, which are common in Dublin, allow 48 hours between coats to prevent adhesion failure.
What is the wet edge technique and why does it matter?
The wet edge technique means always rolling back into paint that has not yet dried, working in sections of roughly 1.2 to 1.8 metres. It prevents lap marks, which appear when wet paint meets a dried edge and leaves a visible line in the finished surface.