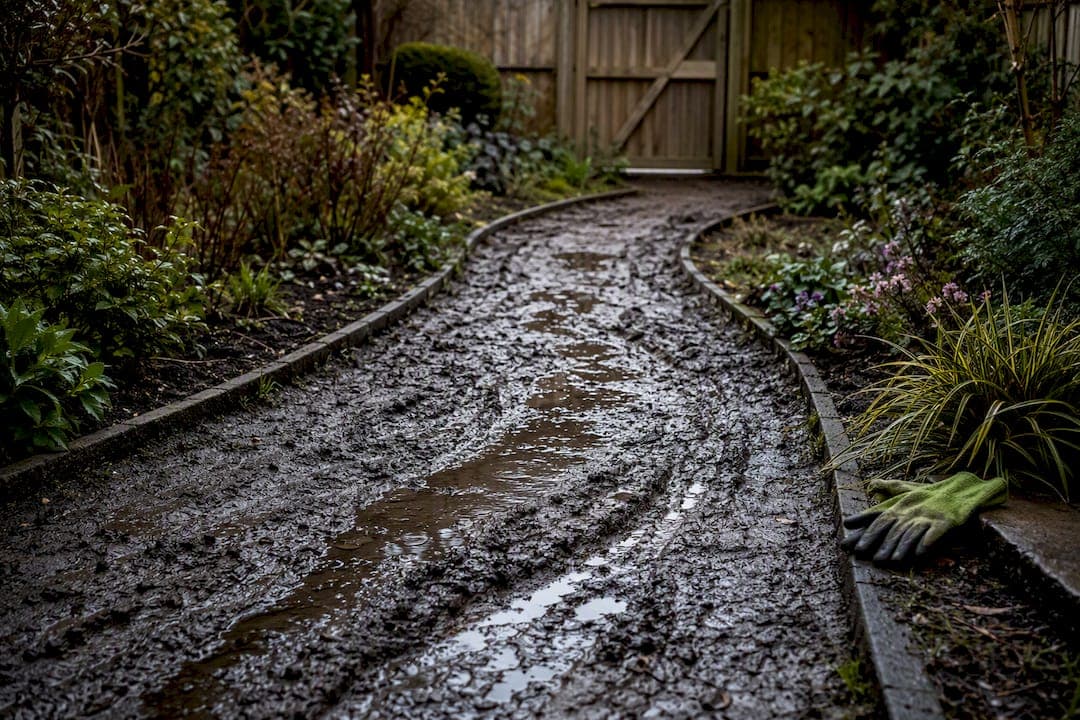
Add a permeable layer of gravel or mulch straight away to stop the mud and get your path usable again. For a fix that lasts, resolve what's causing the mud underneath: poor drainage, compacted soil, or the wrong levels. If a soil pit still holds water after heavy rain or DIY fixes keep failing, that's your sign to call in a professional for muddy garden path solutions that actually hold.
TL;DR:
- Gravel paths with a properly compacted sub-base and edging are effective long-term solutions for stopping mud and draining water.
- Identifying drainage issues through soil pit testing helps determine whether the problem is surface wear or a structural fault requiring professional intervention.
- Organic matter and aeration improve clay soil over time, reducing high water tables and keeping path edges dry during wet seasons.
- The best time for major groundworks is late summer to early autumn when the soil is driest and least prone to damage.
- DIY fixes like mulch or gravel need regular topping, while permanent solutions involve understanding the root cause and sometimes hiring specialists for proper drainage.
Table of Contents
- Muddy garden path solutions: a shortlist by budget and lifespan
- How to work out why your path keeps turning to mud
- Which path material actually stops the mud?
- How to install a drained, gravel-stabilised path
- Fixing the soil so the mud doesn't come back
- When to call in a drainage specialist instead of DIY-ing it
- Wet season versus dry season: adjusting your approach
- What actually works on the ground: notes from Sherry Property Care
- How Sherry Property Care can help with your muddy path
- Sources
- FAQ
Muddy garden path solutions: a shortlist by budget and lifespan
Not every muddy path needs the same fix. Some just need a quick top-up before a dinner party; others need proper groundwork. Here's how the options stack up, from cheapest to most permanent.
- Bark mulch or wood chip: The fastest fix going. Spread a thick layer over the worst patches and you'll have a walkable path within the hour. It needs topping up every 1–2 years though, and it can churn back into mush on very high traffic or waterlogged routes.
- Rolled walkways or timber boards: Good for a season's stopgap over a boggy patch, particularly on allotments or while you save for something permanent. They shift underfoot over time and rot eventually.
- Crushed angular gravel with edging: A proper mid-range stabiliser. Angular stone in the 10–20mm range locks together far better than rounded pea shingle, which just rolls underfoot. Edging keeps it from migrating into the lawn.
- Grass reinforcement grids: Plastic or recycled honeycomb grids that let grass grow through while spreading foot and wheel load. Ideal if you want to keep a green look without the constant mud.
- Regraded path with permeable pavers or piped drainage: The proper long-term answer where the mud comes from a genuine drainage fault rather than surface wear. Costs more upfront but stops the problem returning every winter.
Cheap fixes buy you time. Durable builds buy you an end to the argument about muddy shoes in the hallway.
How to work out why your path keeps turning to mud
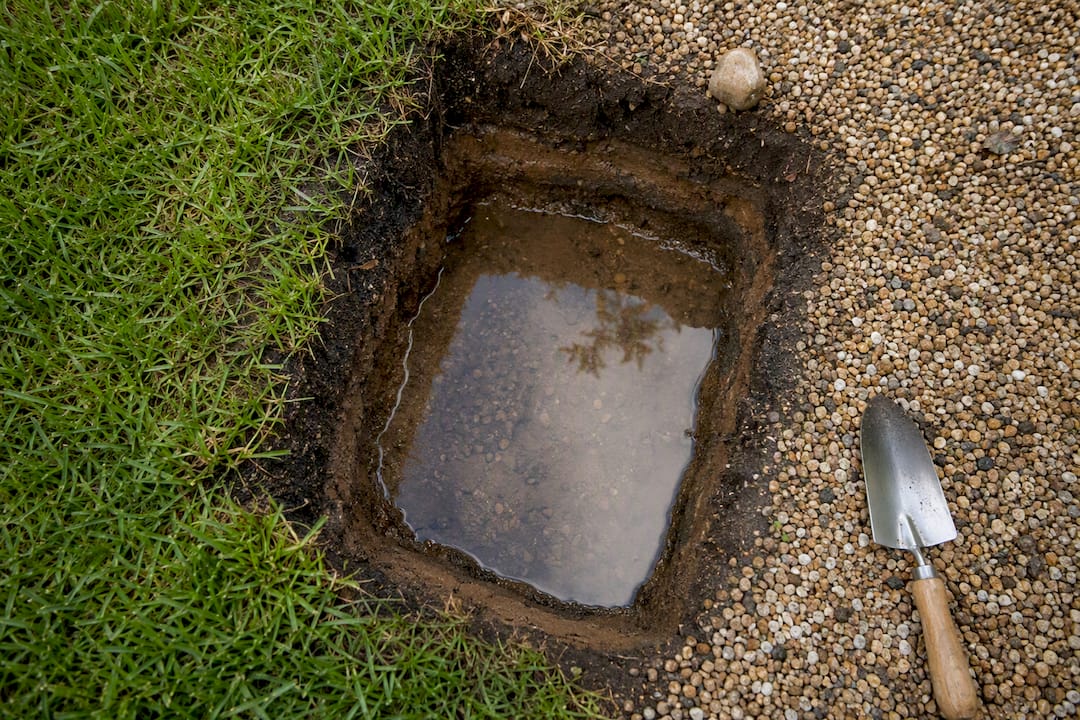
Guessing at a fix wastes money. Dig a small test pit, roughly 30 to 60cm deep, in the boggiest spot and leave it a few hours after rain.
- Check for standing water. If water sits in the pit rather than draining away, you're likely dealing with a high water table or a genuine drainage fault, not just soil on the surface.
- Press the soil at different depths. Hard, dense clay a few centimetres down that resists a garden fork usually points to compaction from repeated foot traffic.
- Look at the slope. If the path sits in a dip or slopes towards a fence rather than away from it, poor levels are your main culprit, and a gentle 1–2% fall away from structures often solves it before you touch a spade for anything bigger.
- Note the season. Mud that appears every winter and vanishes by June is typical clay behaviour. Mud that persists through a dry August points to a structural fault, such as a blocked land drain or a high water table.
Pro Tip: Do this test on two or three different spots along the path. A single soggy corner near a downpipe tells a different story to a path that's wet along its whole length.
Which path material actually stops the mud?
Material choice decides whether you're fighting mud again next winter or forgetting the problem exists. The core distinction is permeability: does water soak through the surface, or does it pool on top and turn everything to sludge?
- Crushed angular gravel (10–20mm): Highly permeable and, because the stone edges interlock, far more stable underfoot than rounded gravel or pea shingle. Needs edging to stop it spreading and the occasional top-up.
- Permeable pavers: Look neat, take wheelbarrows and light vehicles well, and let water pass through the joints if laid correctly. The whole build-up, base, membrane and jointing all have to work together, or the surface simply behaves like solid paving and the mud problem just moves to the edges.
- Artificial grass: Looks tidy and needs no mowing, but unless it's laid over a properly drained sub-base, water can pool underneath and turn the edges swampy.
- Bark or wood chip mulch: Cheap, permeable, and forgiving on bare feet, but it compacts and rots down, so it's better suited to lower-traffic routes.
For maintenance, loose surfaces like gravel and mulch need occasional raking and topping up. Paved or gridded surfaces need less upkeep but cost more to lay and are harder to adjust once they're down.
How to install a drained, gravel-stabilised path
This is the build most homeowners land on, because it balances cost, drainage and how it looks once it's finished. Work only when the ground is dry. Attempting groundworks on waterlogged soil damages its structure and can leave you worse off than before you started, so late summer through early autumn is usually the safest window before the ground turns.
- Mark and excavate. Dig out the path to around 15 to 20cm deep, following the intended route.
- Lay a weed-suppressant membrane. This stops weeds pushing through and keeps the sub-base and topping layers separate.
- Add and compact a sub-base. A layer of crushed hardcore, compacted firmly, gives the path structure and helps water drain down rather than pool on the surface.
- Top with 10–20mm angular gravel. Rake it level to a depth of around 5cm.
- Fit edging. Timber, metal or plastic edging keeps the gravel contained and stops it drifting into borders or the lawn.
Pro Tip: Rake the gravel every couple of months and top it up once a year in high-traffic spots. Five minutes with a rake beats a full re-lay every few years.
For a broader run-up to path work, our step-by-step grounds keeping guide covers site preparation in more depth, and clearing old debris first makes the whole job faster; our garden waste removal guide walks through that.
Fixing the soil so the mud doesn't come back
A path can be perfectly built and still turn muddy at the edges if the surrounding soil stays waterlogged. Heavy clay is the usual culprit, and it needs ongoing attention rather than a one-off fix.
- Add organic matter regularly. The RHS recommends roughly one barrow load of well-rotted organic matter per square metre worked into clay soil to improve its structure over time. Sand or grit alone rarely helps and can make clay behave worse.
- Aerate compacted lawn edges. Hollow-tine aerating and top-dressing the holes with compost lets water soak in faster instead of sitting on the surface.
- Choose tolerant planting nearby. Groundcovers that handle damp roots reduce bare, mud-prone soil beside the path.
- Consider raised beds or a rain garden. Where a genuine high water table exists, redesigning that area rather than fighting it is often the more sensible route.
Our soil-care routines for Ballinteer gardens covers seasonal aeration timing in more detail if you want a fuller routine to follow.
When to call in a drainage specialist instead of DIY-ing it
Some jobs are worth handing over. If your soil pit still holds water hours after rain, or you've tried gravel and regrading and the path still floods every winter, that's a structural drainage issue rather than a surface one.
Before any piped drainage goes in, someone needs to establish where the water will actually go. Connecting surface water to a public sewer without permission is generally not allowed, so a legal, private outfall has to be identified first.
When getting quotes, ask:
- Where will the water outfall to, and is that route legal and practical?
- Will the work need planning consent or neighbour agreement?
- What materials are being used, and is workmanship guaranteed?
A professional assessment goes further than a DIY soil pit test. It typically involves proper diagnostics, machine excavation where needed, and a guarantee on the finished work, which is hard to replicate with a spade and a Saturday afternoon.
Wet season versus dry season: adjusting your approach
Muddy paths behave differently depending on the time of year, and treating a winter problem with a summer fix (or vice versa) wastes effort. In wet months, the priority is damage control: keep a permeable wearing layer topped up, avoid walking the same worn line repeatedly (it deepens ruts), and hold off on any major groundworks until conditions dry out.
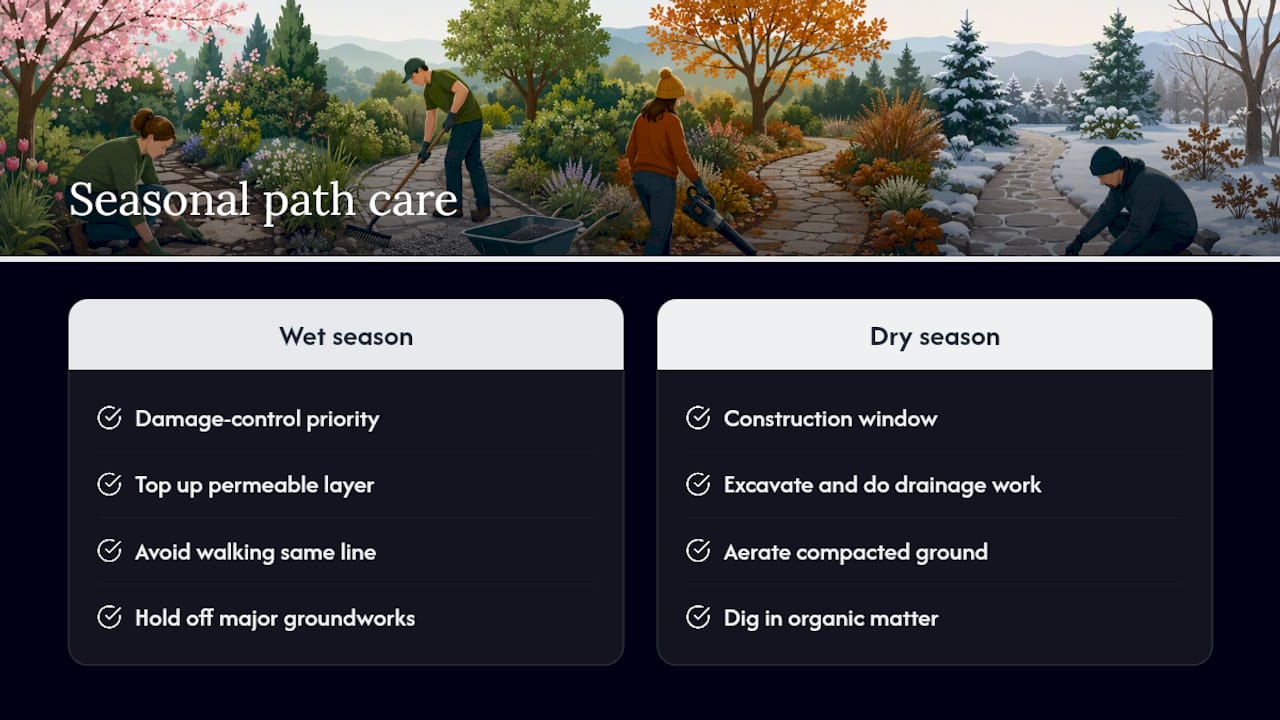
Dry spells are your construction window. Late summer to early autumn is when soil structure is least likely to be damaged by excavation or compaction, which is why most drainage and path-building work gets scheduled then rather than mid winter.
It's also worth using the dry months to get ahead on soil improvement. Digging in organic matter, aerating compacted ground, and levelling for a gentle fall away from the house all work better when the ground isn't saturated. Come the next wet season, that groundwork is what stops the mud reappearing rather than just masking it under fresh gravel.
If your garden also has paved areas near the path, algae and grime build up fastest over a damp winter. Giving those surfaces a clean once the weather turns is worth doing at the same time; our patio power washing guide covers that safely.
What actually works on the ground: notes from Sherry Property Care
We've patched plenty of paths where gravel over a compacted base, paired with a simple regrade, turned a permanent bog into a usable route within a day. Every quote gets tailored to the site, because a shaded clay garden behaves nothing like a sunny sandy one. Our repeated tip on wet sites: fix the fall before you fix the surface.
— gerard
How Sherry Property Care can help with your muddy path
Grounds maintenance, drainage works and path installation all sit within what we handle day to day for properties across Dublin, from regrading a sodden side passage to laying a full gravel and drainage build that survives an Irish winter.

Getting a quote doesn't need a site visit before you've even decided it's worth the cost. Send a few photos of the problem area, describe the access (side gate, front garden, shared passage) and tell us how bad the mud gets after rain. From there, we put together a tailored quote based on what your garden actually needs, not a generic price list. If the job needs a proper assessment first, we'll say so before any work starts, not after. Get in touch through Sherry Property Care and describe your muddy path, and we'll get back to you with next steps.
Sources
FAQ
What's the best way to dry up a muddy yard?
Add a permeable surface such as gravel, mulch or reinforcement grids over the worst areas immediately, then address the root cause with regrading, aeration or organic matter added to the soil.
What soaks up mud in a yard?
Coarse organic matter and angular gravel both help, but they work differently: organic matter improves how clay drains over time, while gravel simply sits above the mud and gives you a dry surface to walk on. Sand and fine grit rarely help and can make clay soil worse.
How can I firm up muddy ground?
Compact a sub-base of crushed hardcore beneath a topping of 10 to 20mm angular gravel, and fit edging to stop it spreading. For lawn areas, aerating with a hollow-tine tool and top-dressing with compost firms up compacted, waterlogged soil.
How often does a gravel path need topping up?
Expect to rake and top up gravel roughly once a year on high-traffic routes, more often near gates or shaded, damp corners where it tends to sink or migrate.
When should I call a professional instead of fixing it myself?
Call a specialist if a soil pit still holds standing water hours after rain, if DIY fixes keep failing, or if you suspect the water needs a piped outfall, since that requires checking legal and practical drainage routes first.