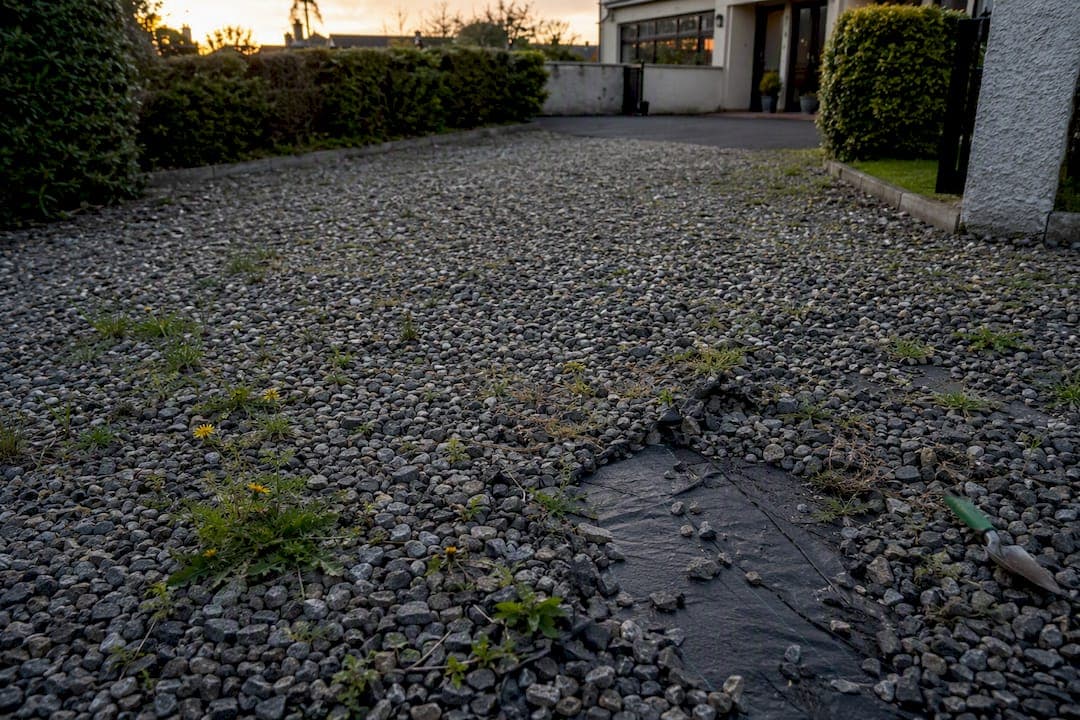
Clear existing weeds first, using hand tools for small patches or a systemic weedkiller for stubborn perennials, then fit or repair a weed membrane and top up the gravel to the right depth. That combination solves the problem at both ends: removal deals with what's growing now, prevention stops the next generation taking hold. Small patches usually need nothing more than a weeding fork and ten minutes. A full driveway with membrane failure needs both stages done properly. Skip the salt, whatever anyone tells you.
TL;DR:
- Using a combination of hand tools and systemic herbicides effectively removes deep-rooted weeds like dandelions and dock from gravel driveways.
- Applying residual weedkillers with proper timing and installation of a quality membrane significantly reduces weed emergence for several months.
- Larger gravel, angular stones over 20mm, and a minimum of 50mm depth improve drainage and weed resistance compared to finer, rounded gravel layers.
- Regular maintenance, including seasonal clearing and gravel top-ups every two to three years, prevents weed buildup and membrane failure.
- Professional driveway maintenance offers a cost-effective, long-term solution for large or persistent weed problems, saving time and effort over DIY attempts.
Table of Contents
- Quick shortlist: proven methods and when to choose each
- Step-by-step removal workflow for existing weeds
- Safe chemical guidance and timing: how to use herbicides responsibly
- Prevention: membrane, correct gravel depth, edging and installation best practice
- Ongoing maintenance schedule and quick routines
- Benefits and drawbacks of using different gravel types or sizes in weed reduction
- Identification of common weed types specific to gravel driveways and targeted control methods
- Preventative measures for weed seeds entering the driveway
- Long-term strategies for gravel driveway weed control
- Environmental impact and safety considerations of different weed control methods
- A practical view from the ground
- Hire a professional for gravel driveway weed control in Dublin
- Sources
- FAQ
Quick shortlist: proven methods and when to choose each
Not every gravel driveway needs the same fix. A few dandelion seedlings by the gatepost call for a different response than a drive where couch grass has pushed through in a dozen spots.
- Hand removal and tools: A weeding fork, Dutch hoe or dandelion weeder handles small patches or occasional weeds well, especially when the ground is slightly damp and roots pull free cleanly.
- Boiling water and flame weeders: Both work as non-chemical contact methods on young annual weeds, scorching or scalding the foliage on the spot. Neither has any residual effect, so they're safer for the soil than salt, but they won't touch established roots.
- Total systemic weedkillers: Glyphosate-based products translocate into the root system and are the most reliable option for deep-rooted perennials like dandelions or dock that keep coming back.
- Residual path products: These leave a chemical barrier in the surface that stops new germination for months, making them useful where nothing is ever going to be planted.
- Membrane and correct gravel depth: This is the long-term fix. Combine it with removal work rather than treating it as a standalone cure.
Rock salt deserves a specific warning here. It might look like it's working in week one, but it damages soil structure permanently, leaches into borders and can corrode nearby paving and metalwork. There are better options for every situation salt gets used for.
Step-by-step removal workflow for existing weeds
Before touching a single weed, work out whether you're dealing with annuals or perennials. Annual weeds, like groundsel or annual meadow grass, complete their life cycle in one season and usually pull out with the roots intact. Perennials, such as dandelions, dock and bindweed, regrow from any root fragment left behind, which is why yanking the top off one rarely finishes the job.
Tools checklist: weeding fork, Dutch hoe, dandelion weeder (the long thin blade type designed to get under a taproot), paving brush, a wheelbarrow for spoil, and a decent pair of gloves.
- Clear surface debris and leaf litter first. This is where most weed seed actually germinates, according to RHS guidance on hard surfaces, so a thorough rake and sweep does real preventative work before you've pulled a single weed.
- Expose the crown and root of each weed by brushing gravel aside gently rather than dragging your tool through it.
- Remove annual weeds by hand or with a dandelion weeder, aiming to lift the whole root. For perennials that snap or resist, apply a targeted systemic treatment instead of fighting the root by hand.
- If you've used a systemic herbicide, leave the dead foliage in place until it browns off completely. Practitioners consistently point to this step as the one most people rush. Pulling foliage too early interrupts the translocation process that carries the chemical down to the root, which is exactly why the same weed reappears three weeks later.
- Once foliage has died back fully, clear it away, rake the gravel level, and top up any thin patches.
Persistent perennials like bindweed or ground elder often need a second or even third treatment across a season, particularly where the root system runs deep or spreads laterally under the membrane.
Pro Tip: Never strim or mow weeds in gravel before they've set seed and then leave the clippings on the drive. You'll scatter seed across every gap in the stone and undo weeks of work in one afternoon.
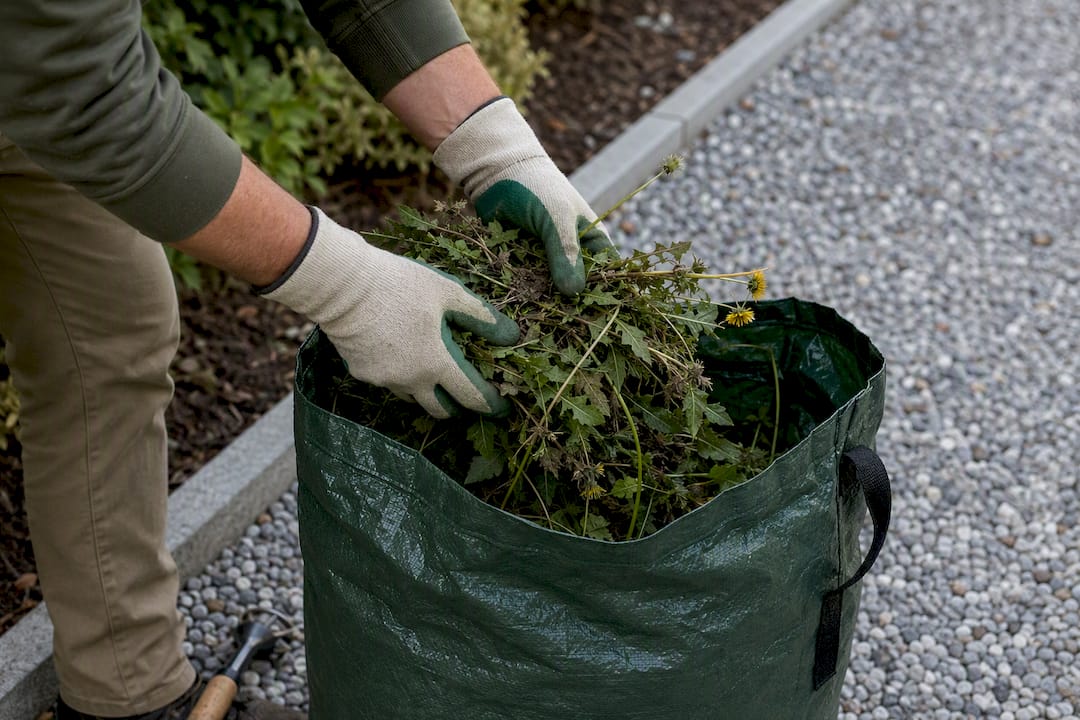
Bag pulled weeds rather than tipping them straight onto a compost heap, especially anything already in flower or seed. Home compost rarely gets hot enough to kill weed seed reliably, so bagging for green waste collection is the safer disposal route.
Safe chemical guidance and timing: how to use herbicides responsibly
Total systemic herbicides and residual path weedkillers do different jobs, and mixing up when to use each is one of the most common driveway mistakes. A systemic glyphosate product kills the plant you spray, roots included, but has no lasting effect on future germination. A residual path product does the opposite: it leaves an active barrier in the surface layer that suppresses new seedlings for an extended period, which shortens how often you need to treat the area again, according to Agrigem's advice on weed-free gravel.
Timing matters more than most people assume. Apply on a dry day with no rain forecast for several hours, since rain washes the product off leaves before it's absorbed. Leave the foliage untouched until it browns fully rather than clearing it the next day.
- Never use residual path weedkillers near lawns, flower borders, or anywhere you might plant later. They don't discriminate between weeds and wanted plants, and the residue can persist in soil for months.
- Wear gloves and eye protection, and check the product label for any additional PPE requirements before spraying.
- Spray on a still day to prevent drift onto neighbouring plants, and keep pets and children off the area until it's dry.
- Avoid drains, gullies and any route to a watercourse. Herbicide runoff into water is both an environmental risk and, in most cases, a legal one.
Household vinegar gets recommended online constantly as a "natural" fix. It scorches leaf tissue on contact in much the same way boiling water does, but it has no effect on established roots and needs repeated applications that gradually acidify the soil. Salt causes worse long-term damage still, and neither belongs anywhere near a driveway you want to keep looking decent.
Prevention: membrane, correct gravel depth, edging and installation best practice
Most weeds in a gravel driveway aren't punching up from some hidden root system below. They're germinating from seed sitting in the thin layer of dust, leaf litter and organic debris that builds up on the surface, a point UK practical guides on stopping weeds through gravel make clearly. That's genuinely good news, because it means a clean surface and the right depth of stone does far more preventative work than people expect. Membrane helps enormously, but it isn't an absolute cure on its own, particularly if it's laid badly.
- Membrane type: Woven polypropylene membrane outperforms cheaper non-woven fabric for driveways because it resists tearing under vehicle weight while still letting water drain through.
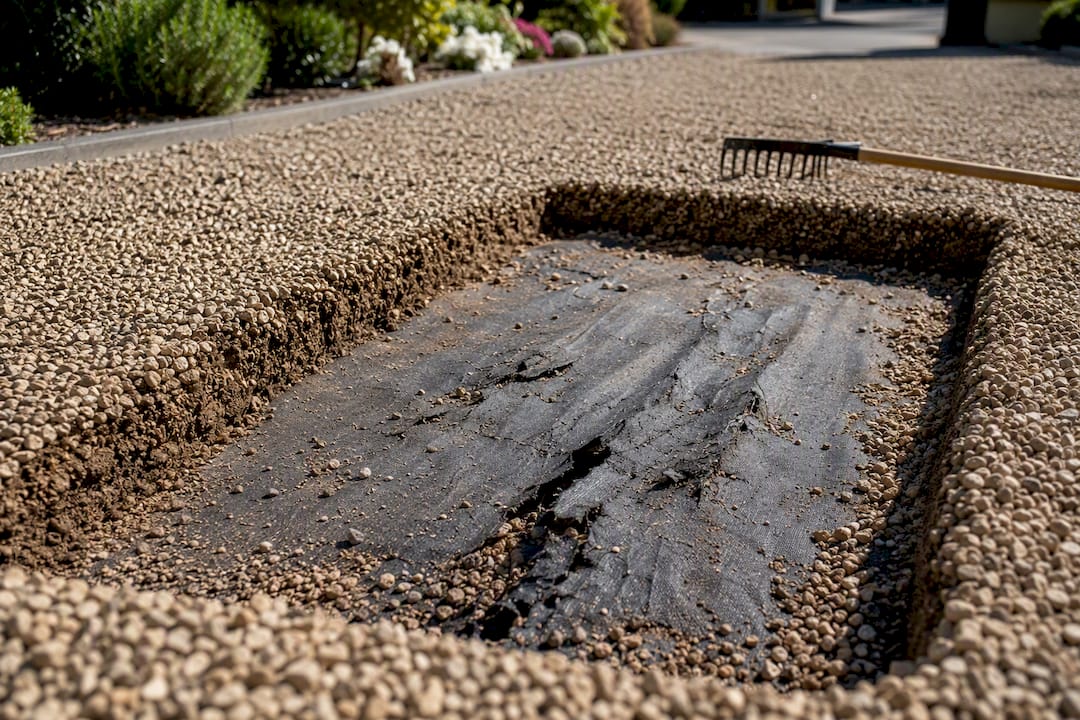
- Overlap and pinning: Overlap strips by at least 150mm and pin every 30 to 40cm. Skimping on either is the single most common reason membrane fails early, letting weeds punch through the seams within a year.
- Sealed edges: Fold membrane up against borders and walls rather than stopping it flush, which stops weeds creeping in sideways along the edge.
- Gravel depth: Aim for a minimum of 50mm over the membrane, or 75mm where the drive takes vehicle traffic, a figure consistent across installation guidance from Agrigem and echoed in Homebuilding's advice on gravel depth.
- Top-ups: Refresh the gravel every two to three years as stone gets displaced by tyres and foot traffic, thinning the layer in wheel tracks and gateways where weeds then find their opening.
- Edging: Metal or plastic edging strips stop gravel migrating onto lawns and stop grass and border weeds migrating the other way into the drive.
Pro Tip: If you want a softer look than a strict edge, plant low, tough species like thyme or chamomile deliberately in the joints near a border. A weed you planted on purpose stops being a weed problem.
Consider a full re-lay when membrane has failed across large sections or when perennial weeds are re-establishing from root systems that predate the membrane itself. Patching one corner of a driveway where the underlying membrane is already shot rarely holds for long.
Ongoing maintenance schedule and quick routines
A driveway that gets ten minutes of attention every few weeks rarely develops a serious weed problem. One that gets ignored for a whole summer usually needs a full clearance by September.
- Spring: Treat any weeds that survived winter early, before they set seed and multiply the problem tenfold.
- Late spring: Repeat treatment on small emerging seedlings, since this is the season most annual weeds germinate in bulk.
- Summer: Spot check every few weeks rather than doing a full sweep. Catching a seedling at three centimetres takes seconds; catching it at knee height takes a spade.
- Autumn: Tidy fallen leaves and organic debris, then top up thin patches of gravel before winter compacts what's left.
- Winter: Minimal work needed, though a quick check after storms for washed-out gravel or exposed membrane pays off in spring.
Rake and sweep debris from the gaps weekly if you can manage it, or monthly at a minimum, and spot-spray or pull any small seedling before it flowers. Check membrane and edging condition at each seasonal changeover rather than waiting until you spot a problem.
If perennial weeds keep returning across a large area despite repeated treatment, or membrane has failed in multiple places, that's usually the point where calling in a driveway maintenance professional saves more time than another summer of DIY.
Benefits and drawbacks of using different gravel types or sizes in weed reduction
Gravel size and shape make more difference to weed resistance than most people realise when they're standing in a builders' merchant deciding between options.
Larger, angular gravel (20mm and above, such as clean chippings) settles into a denser, more interlocked layer that leaves fewer gaps for wind-blown seed to lodge in and germinate. It also drains faster, so there's less standing moisture to help seedlings establish. The trade-off is comfort and cost: bigger stone is harder underfoot, noisier under tyres, and typically pricier per tonne.
Smaller, rounded pea gravel (around 10mm) looks neater and is far more comfortable to walk on, but according to Homebuilding's guide on removing gravel weeds, shallower layers of finer stone let weeds establish more readily, since fine material traps organic debris and moisture more effectively than coarse chippings.
Self-binding gravel, which compacts into a near-solid surface, offers the best weed resistance of any loose stone option because there's almost no gap for seed to reach soil or membrane. It needs occasional re-compaction and isn't always suited to heavy vehicle turning circles.
For most driveways, a mid-to-large angular gravel over a properly installed membrane gives the best balance of weed resistance, drainage and practicality. Whatever size you choose, depth still matters more than the stone itself.
Identification of common weed types specific to gravel driveways and targeted control methods
Knowing what you're actually looking at changes which method is worth your time.
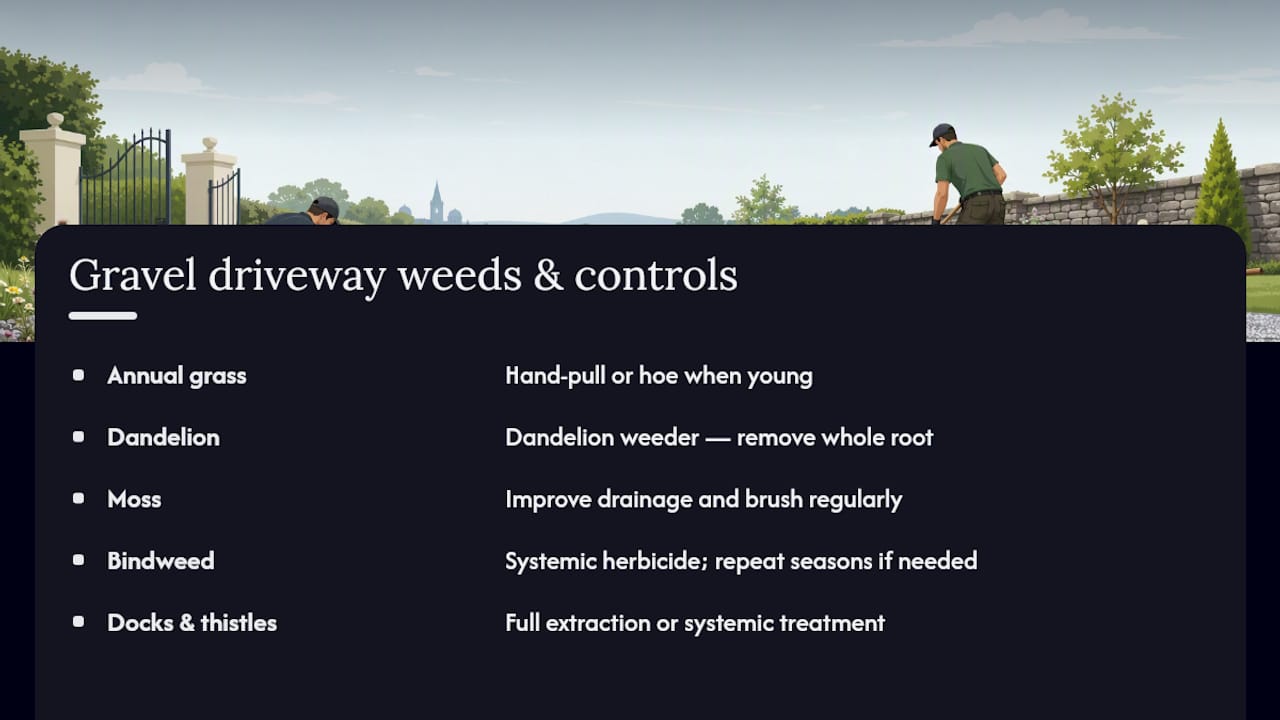
Annual meadow grass and groundsel germinate fast from surface seed and pull out easily by hand while young. Boiling water or a flame weeder deals with these efficiently since there's no deep root to worry about.
Dandelions send down a long taproot that snaps if you pull carelessly, leaving enough behind to regrow. A dandelion weeder, which slides down alongside the root to lever it out whole, works far better than gripping and pulling.
Moss, while not technically a weed, colonises damp, shaded gravel and signals poor drainage or a compacted surface. Improving drainage and brushing regularly does more long term than any product.
Bindweed is the one that tests patience. Its roots run laterally underground and regrow from tiny fragments, so hand removal alone rarely finishes it. A systemic herbicide, applied and left until foliage fully browns, is usually the only reliable route, sometimes needing two or three seasons of repeat treatment.
Docks and thistles behave similarly to dandelions: deep taproots that need either full extraction or systemic treatment rather than surface cutting, which just triggers regrowth from the crown.
Matching the tool to the weed saves real effort. Pulling a bindweed by hand is a losing battle; treating a groundsel seedling with glyphosate is overkill when a hoe would do it in seconds.
Preventative measures for weed seeds entering the driveway
Stopping seed arriving in the first place is cheaper than treating it once it's established, and it's the step most homeowners skip entirely.
Edge barriers, whether metal, plastic or a low kerb, do double duty: they hold gravel in place and stop lawn grass, border weeds and topsoil creeping laterally into the stone. Without one, grass runners from an adjacent lawn will colonise the gravel edge within a season or two regardless of how well the membrane is laid elsewhere.
Vehicle tyres and shoes are an underrated seed vector. Mud carried in on tyres from a farm gate, a building site or even a muddy garden path can carry weed seed straight onto a clean drive. A boot scraper or a designated wipe-down area near the entrance reduces how much gets tracked in, particularly useful if the property backs onto fields or unmade lanes.
Keeping adjoining borders weeded before they set seed matters just as much. A dandelion left to flower in a nearby bed will send seed drifting onto the gravel on the first breezy day, undoing weeks of clearance work in the driveway itself.
Finally, avoid storing topsoil, compost, or garden waste directly on or beside the gravel even temporarily. All three carry dormant seed that germinates readily once it lands somewhere with light and moisture, which a gravel surface provides in abundance.
Long-term strategies for gravel driveway weed control
Weed control on a gravel driveway isn't a one-off job. It's a cycle, and treating it that way from the start saves far more effort than reacting to problems as they appear.
Periodic deep cleaning, roughly every one to two years depending on how sheltered the site is, clears the build-up of leaf litter, moss and fine dust that forms the seed bed for the next generation of weeds. This is worth doing alongside a broader driveway clean rather than as an isolated task, and a thorough power wash of nearby hard surfaces often forms part of that same seasonal tidy-up.
Gravel replacement cycles matter too. Stone thins in wheel tracks and gateways over several years as traffic displaces it sideways, exposing membrane and creating exactly the weak points where weeds get their first foothold. Planning a top-up every two to three years, rather than waiting until bare patches are obvious, keeps the membrane properly covered and the weed barrier intact.
For driveways where the membrane has failed extensively or perennial weeds keep regrowing from roots established before the membrane went in, a full re-lay is the only strategy that actually resets the clock. Patching around persistent failure points tends to buy a season, not a solution.
The households that get genuinely low-maintenance results treat gravel care as a rolling routine rather than a rescue mission. Small, regular effort consistently beats occasional heroic clearance.
Environmental impact and safety considerations of different weed control methods
Every method here carries a different environmental trade-off, and it's worth weighing them against your specific situation rather than defaulting to whatever's fastest.
Hand removal and mechanical tools have essentially no environmental downside beyond effort, though they're slower and less effective against established perennial roots. Boiling water and flame weeding are similarly low-impact, with no residual chemical left in the soil, but neither penetrates deep enough to finish off bindweed or dock.
Systemic and residual herbicides are more effective against persistent weeds but carry genuine risks if used carelessly. Drift onto neighbouring plants, runoff into drains or watercourses, and exposure to pets or children are all real concerns, which is why timing, weather and application method matter as much as the product itself. Residual path products are the more persistent of the two chemically, which is exactly why they're unsuitable anywhere near borders, lawns or future planting areas.
Rock salt sits apart from all of these as the method with the worst environmental profile for the least reliable result. It doesn't break down, it leaches into surrounding soil and groundwater, and it can damage nearby concrete and metal fittings over time. Household vinegar is lower risk but still acidifies soil with repeated use and offers no lasting control.
The safest long-term approach, in environmental terms, pairs mechanical removal with a properly installed membrane, reserving chemical treatment for genuinely persistent perennials rather than routine maintenance.
A practical view from the ground
Most gravel driveway problems come down to the same handful of stubborn species, over and over: bindweed, dandelions, and dock that's been quietly building a root network under the stone for a couple of years before anyone notices. The usual cure path is mechanical removal first to knock back what's visible, a targeted systemic treatment where roots run deep, then membrane repair or replacement so the same weed doesn't just reappear in eight weeks.
Where a quote genuinely saves money is on larger areas, driveways with widespread perennial regrowth, or awkward sections tucked behind parked cars and bins that never get properly cleared during a DIY session. A professional visit on those jobs usually costs less than the gravel, membrane and herbicide a homeowner ends up buying twice after a first attempt falls short. Experience shows the pattern repeats: small jobs are genuinely fine to DIY, but a drive that's been neglected for two or three seasons is rarely a weekend fix.
— gerard
Hire a professional for gravel driveway weed control in Dublin
If clearing weeds and re-laying membrane sounds like more weekends than you've got spare, professional services handle the whole job rather than leaving you to buy tools for a one-off task. It's the practical alternative to a DIY cycle of temporary fixes for homeowners who want their gravel driveway sorted properly, once, rather than patched every summer.

The services cover weed clearance, membrane re-lay where the existing barrier has failed, gravel re-grading and topping up where stone has thinned in wheel tracks, and ongoing maintenance visits for properties that want the job done on a schedule rather than a panic. Getting a quote is straightforward: send photos of the driveway, get a tailored price back, and arrange a site visit if you'd like to talk through the options in person. If your drive has reached the stage where weeding feels like a losing battle, get a personalised quote from Sherrypropertycare and get it handled properly.
Sources
- Weeds on hard surfaces | RHS advice
- How to stop weeds growing through gravel - UK guide | The Garden Patch (Greengaffer)
- How to get weed-free gravelled areas | Agrigem
- How to remove weeds from gravel – and stop them coming back | Homebuilding
FAQ
How do I permanently get rid of weeds in a gravel driveway?
No method is entirely permanent, since seed keeps arriving on the wind, but clearing existing weeds thoroughly, then installing a properly overlapped membrane under at least 50mm of gravel, comes closest to a lasting fix.
How do I get rid of weeds in gravel?
Pull annual weeds by hand with a fork or dandelion weeder, treat deep-rooted perennials with a systemic herbicide, then top up gravel and repair any gaps in the membrane once foliage has fully browned.
What is the best weedkiller for gravel driveways?
A systemic glyphosate product works best on established perennial weeds by killing the root, while a residual path weedkiller suits areas with no planting nearby where you want to suppress new germination for longer.
Will salt kill weeds in a gravel driveway?
Salt can kill surface growth temporarily, but it causes lasting damage to soil and can leach into borders and corrode nearby paving, so it's not recommended as a weed control method.